Although today these specs have no value, there was a time when Galaxy Tab GT-P1000 ruled the Tab world with its breathtaking specs. If you still own this fabulous tablet and want to perform some unofficial system improvements, then rooting is the only way to do so. Here, we’ll see a detailed procedure on how to Root & install CWM recovery on Galaxy Tab GT-P1000. Besides, after rooting your Galaxy Tab GT-P1000, you can perform various operations like flashing custom ROMs, recoveries, kernels, taking Nandroid backup, increasing internal memory, overclocking CPU, removing bloatware, etc. This Tab GT-P1000 was officially launched with Android v2.2 Froyo, which was later upgraded to Android v2.3 Gingerbread OS. But after GB Samsung stopped launching further updates to this tablet which broke the hearts of many users. Moreover, they had only one way to enjoy the latest Android OS i.e. by flashing unofficial custom ROMs. But before flashing custom ROM you need to root your device. This guide can be used for both Froyo and Gingerbread running OS.
How to Root and Install CWM Recovery on Galaxy Tab P1000
In this guide, we’ll root Samsung Galaxy Tab using three methods. Moreover, we’ll use the Odin tool and ROM Manager app to flash CWM recovery. Let’s get started.
Disclaimer
Try this process at your own risk. We at Droid Thunder will not be held responsible for any damage whatsoever.
Caution
Note that this guide is only for Samsung Galaxy Tab with the model number GT-P1000. Do not implement this on any other device or variant. It might cause permanent damage to your device.
Requirements
Charge battery of your Galaxy Tab at least up to 60%. This procedure will void your device warranty. Ensure that mobile-specific USB drivers are installed on your PC. Moreover, Enable the USB Debugging mode on your device. Also, disable Antivirus and firewall protection.
Steps to Root Samsung Galaxy Tab GT-P1000
Here, we’ll use three easy methods to gain root access to your Samsung Galaxy Tab.
Method 1: DoomLord’s Toolkit
At first, we’ll root the Galaxy tab using the Doomlord Toolkit.
Downloads
DoomLord’s Toolkit
Steps to Root Galaxy Tab
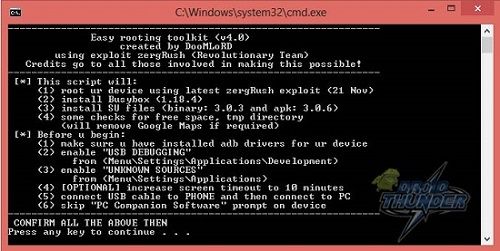
Download DoomLord’s Toolkit on your computer and extract it in a specific folder. Using USB data cable connect your Galaxy Tab to the computer. Do not mount SD card just connect your Tab to PC. Double-click on runme.bat file. This will launch the command window.
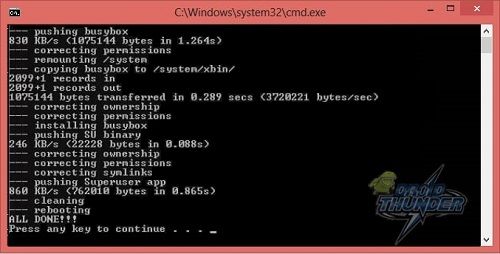
Furthermore, press any key to initiate the rooting process. Be patient and wait for a minute to complete the process. All Done messages appearing in the command window will confirm that the Rooting process is completed.
Moreover, you can now disconnect the tablet from the PC and reboot once. After rebooting go to the applications and you’ll find a Superuser app installed in your device which will confirm that you’ve successfully Rooted your Galaxy Tab GT-P1000.
Method 2: Superoneclick
Here, we’ll use the Super one-click tool and gain the root access.
Downloads
Superoneclick
Steps to Root Galaxy Tab
Download and extract Superoneclick in a specific folder on the PC. Using USB data cable connect your Tab to PC. Besides, do not mount the SD card. Double-click on the Superoneclick.exe file. Now click on the Root option to start the rooting process. The Rooting process will take a few minutes to complete. Upon completion, a successful message will appear on the screen. Just disconnect your Tab from PC and restart once.
Method 3: z4root Android App
In this method, we’ll root your Android device using z4root application.
Downloads
Z4root apk
Steps to Root Galaxy Tab
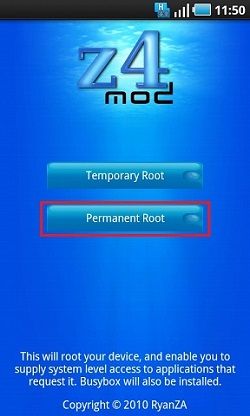
Download and install the z4root app on your tablet. Now launch the app. Click on the Permanent Root option.
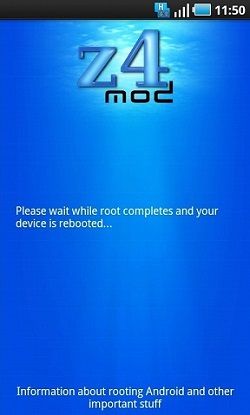
As soon as you click on it, the Rooting process will start.
Wait for a minute to complete it successfully. The app will also install SU binaries and Busybox. Finally! This is how you can root the Galaxy Tab using the z4root app. Now you are free from the restrictions imposed by the manufacturers. You can flash custom ROMs, recoveries, kernels, take Nandroid backup, overclock CPU, and do much more!
Steps to install CWM recovery on Galaxy Tab GT-P1000
Here, we’ll flash CWM custom recovery on Galaxy Tab using Odin and ROM Manager app. Let’s get straight into the flashing process.
Method 1: Odin Multi Downloader
In this method, we’ll use the Odin flash tool to flash CWM recovery on Galaxy Tab.
Downloads
Odin3 v1.7 Tool CWM recovery
Steps to flash CWM recovery on Galaxy Tab
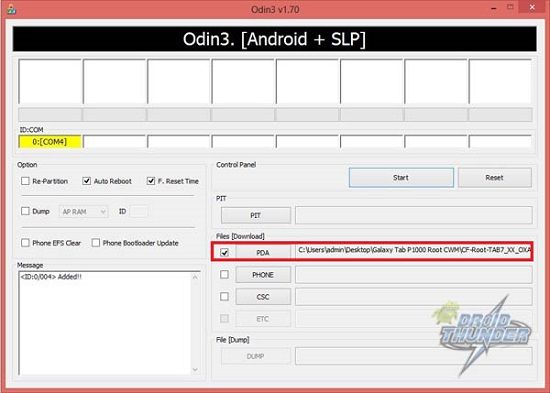
Download and extract the Odin v3 v1.7 software on your computer. Similarly, download the CWM recovery.rar file in a specific folder on your computer. Do not extract this recovery file. Moreover, power off your Galaxy Tab. Now you need to enter the downloading mode. For that simply press and hold the Volume down + Power button simultaneously. Launch the Odin v3 v1.7 software on your computer. Now using the USB data cable connect your tablet (which is in download mode) to the computer. The Odin tool will automatically recognize the device by showing an Added message. Also, the ID: COM section will turn yellow with a random COM port number. If such a thing doesn’t happen then download and re-install the Samsung USB drivers. If the problem persists then replace USB data cable or use a proper working USB port. Tick the Auto Reboot and F.Reset Time options. Do not tick the Re-Partition option as it can increase the chance of bricking your device. Click on the PDA button and browse to the CWM recovery (.rar) file and select it.
Hit the Start button to initiate the Clockworkmod recovery flashing process. Do not unplug the cable and wait for the process to complete. After a few minutes, Odin will show a Pass message. This will confirm that the CWM recovery flashing process is completed successfully. You may safely unplug the USB cable now. Finally! This is how you can install CWM recovery on Galaxy Tab P1000.
Method 2: Using ROM Manager App
Here, we’ll use the ROM Manager app to flash CWM recovery.
Downloads
ROM Manager
Steps to install CWM recovery on Galaxy Tab
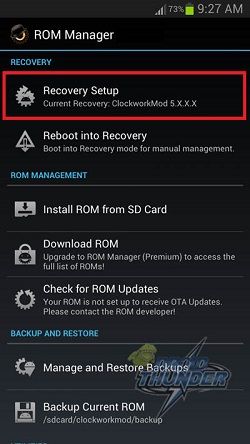
Download and install the ROM Manager app on your tab. Launch the App. Click on the Recovery Setup option.
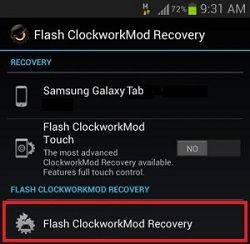
On the next screen, click on the Install Clockworkmod recovery option. Confirm your phone’s model and tap on the Flash Clockworkmod recovery option to start the flashing process.
After a minute, Clockworkmod recovery will get successfully flashed.
Conclusion
Finally, you’ve successfully ROOTED and flashed Clockworkmod (CWM) custom recovery on your Samsung Galaxy Tab GT-P1000. If you have any problems regarding this guide, message me through the comments box below. Notify me of follow-up comments by email. Notify me of new posts by email.
Δ Thing happen is an icon shown, and nothing to do with the tab. (logo which a phone on the left and computer on the right, with a ‘!’ sign inside a yellow triangle between the phone and computer logo) Please help. Thank you. Please help me.