The Find My iPhone option has been proudly touted as an anti-theft measure, with stories online of people recovering their iPhone by turning up at the perp’s door with the police in tow. Now Android has added a very similar feature called the Android Device Manager for GPS-equipped smartphones and tablets. It allows you to locate your lost device and also change passwords, lock screen PINs, and even remotely wipe your missing unit. Here’s how to set up your phone or tablet to use the service, so the next time your Nexus 7 falls behind the sofa you’ll be able to track it down.
Setting up Android Device Manager
Step 1 First need to head over to www.google.com/android/devicemanager where you’ll be prompted to accept Google’s request for location data. As this is a tracking service it’s necessary to do this for the feature to work properly.
Step 2 If you already have a Nexus device with location services turned on then it should automatically appear on your list. Here you’ll see the current position of your handset, along with the last time it was used.
Step 3 To switch between devices click on the name and a drop down menu will appear. Select another model and you’ll be taken to the map screen for that one instead. You can also rename each device by clicking on the pencil icon.
Step 4 To step up a new device you’ll need to visit the App Store on the handset itself, then search for the Android Device Manager app. There are a few similar apps, so look for the one with the green circle and target in the middle.
Step 5 Tap the install button and you’ll be presented with another Welcome screen requesting to use your location data. As in Step 1 you’ll need to agree to this if you want to use the service. Tap Accept and you’re ready to go.
Step 6 The screen now looks remarkably like the one in Step 2, this is because the Android Device Manager app basically uses the web interface to run the service. Once your device has found a GPS signal it should appear on the drop-down menu.
Step 7 Now you can take a closer look at the features available. Beneath the device name there are two different icons – Ring, and Set up Lock & Erase. We’ll look at how each of them work in turn, starting with Ring.
Step 8 Selecting the Ring option will allow the app to make your device announce itself at maximum volume for five minutes, even if it’s locked and set to vibrate. This is particularly useful if you’ve lost it somewhere in the house.
Step 9 Selecting Setup Lock and Erase will return a dialog box telling you that you need to send the device a notification. Tap Send and you’ll see a message appear in your notification bar for Android Device Manager, tap this.
Step 10 You’ll now be taken to the settings for the app, where a pop up box will ask if you want to activate the device administrator? Agree to this and your device will now have access to all the security features.
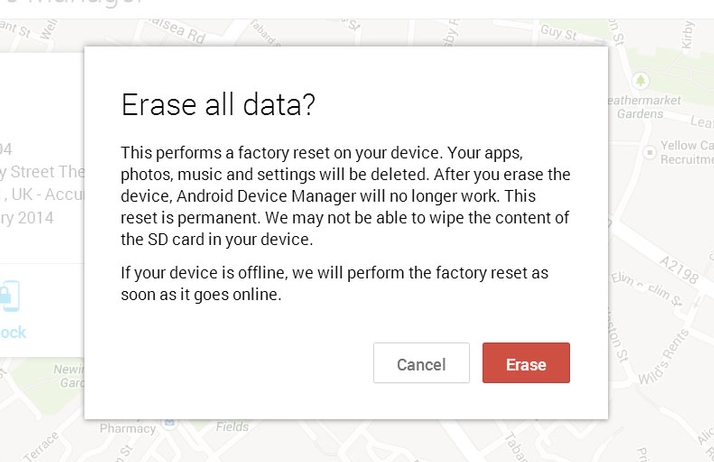
Step 11 The Lock option will now allow you to remotely create a new password for the lock screen, while Wipe is the choice of last resort. Essentially it’s a factory reset which removes all of your data from the device.Very effective in the event of a theft.


